
You can load European DL and US #10 envelopes.
The address is automatically rotated and printed according to the envelope's direction by specifying with the printer driver properly.
 Important Important
- Envelopes with an embossed or treated surface - Envelopes with a double flap - Envelopes whose gummed flaps are already moistened and adhesive |
Prepare envelopes.
 Press down on all four corners and edges of the envelopes to flatten them.

 If the envelopes are curled, hold the opposite corners and gently twist them in the opposite direction.

 If the corner of the envelope flap is folded, flatten it.
 Important Important
|
Load envelopes.
(1) Pull out the cassette (lower) from the machine.

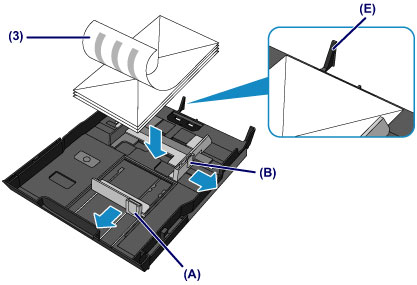
(2) Slide the paper guide (A) in front and (B) on the right to open the guides.
(3) Load the envelopes WITH THE PRINT SIDE FACING DOWN, and place them in the center of the cassette (lower).
The folded flap of the envelope will be faced up on the left side.

(C) Rear side
(D) Address side
Up to 10 envelopes can be loaded at once.
 Note Note
If the envelopes are in contact with the protrusion (E), the envelopes may not be fed properly. |

(4) Align the paper guide (A) in front with the envelopes.
(5) Slide the paper guide (B) on the right to align the right and left guides with both sides of the envelopes.
Do not slide the paper guides too hard against the envelopes. The envelopes may not be fed properly.
 Note Note
|

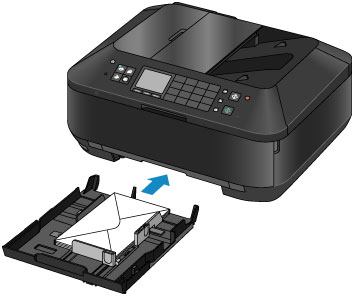
(6) Insert the cassette (lower) into the machine.
Push the cassette (lower) into the machine until it stops.

Open the paper output tray.
(1) Holding both sides of the paper output tray, gently open it.
The output tray extension opens automatically when the paper output tray is opened.
(2) Extend the paper output support.

 Note NoteAfter loading envelopes
|
Page top |